

ALOHA!
Here’s what’s on the schedule for this DIY Oahu tour:
- Bike to Hanauma Bay from Waikiki
- Go snorkeling at Hanauma Bay
- Bike back to Waikiki!
faq: snorkeling at hanauma bay – what to bring to hanauma bay
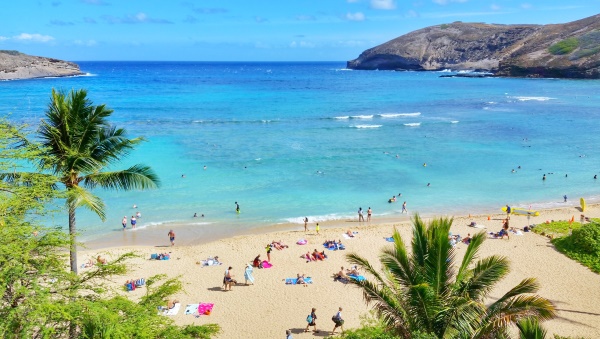
more things to do on oahu by bike
what to wear in hawaii >> what to wear snorkeling – what to wear hiking
Map of bike route to Hanauma Bay from Waikiki
On this Oahu bike map is a suggested bike route for biking to Hanauma Bay.

This isn’t the shortest route, but it is the more scenic route!
Compared to the shortest distance, it may add 1-2 miles to your bike route.
The exact distance will depend on your starting point, but biking to Hanauma Bay will likely be around 11-12 miles one way.
To see how far biking to Hanauma Bay would be for you, enter your departure location on this map.
Side note!
See about the best shoes for hiking in Hawaii and what to wear snorkeling in Hawaii! And for Hawaii vacation ideas, see the best things to do in Waikiki that will give you Hawaii vibes!
Directions to Hanauma Bay from Waikiki
So, what’s on the bike route to Hanauma Bay from Waikiki?!
Here’s a little bit of what you can expect!
As you’re leaving Waikiki, you’ll keep to the road that hugs the coast. This takes you past an open field that is Kapiolani Park on your left side.
As you continue to bike, you will soon be at the base of Diamond Head Crater.
Coming from Waikiki, there is a slight hill. It’s this area that doesn’t really have much extra room for both cars and bikes. But it’s a pretty short time that it’s like this, and once you get past that area, the road gives you a little more room on your bike.
Biking around the crater along the coast gives you stunning views!

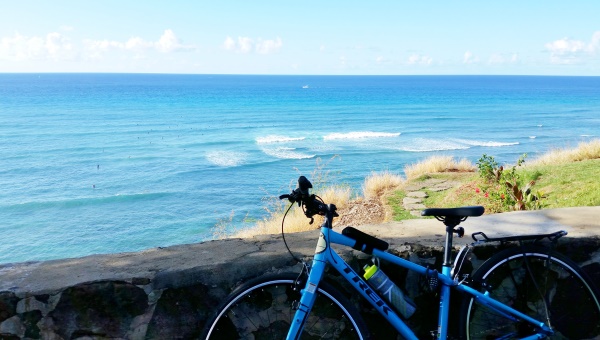
Once you get past the crater, if you keep following the road that you’re on, you’ll be taken into a residential neighborhood.
This feels like a quaint area to ride through.
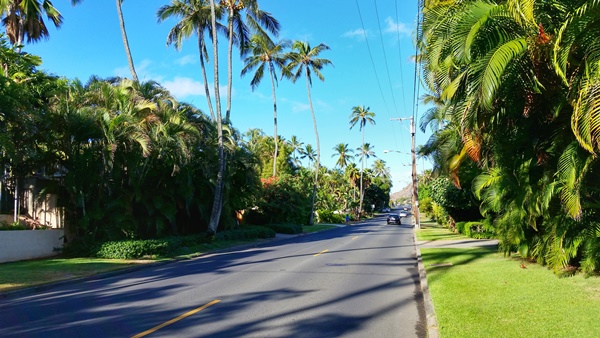
And then it becomes a little busier!
Because next, you’ll be biking on a main road that is the Kalanianaole Highway.
As a main road, there are generally a good number of cars along this road going at high speeds. But there’s a good size bike lane most of the time.

You’ll come across a lot of intersections, so you’ll want to be more careful approaching these intersections for safety.
Along the way, there are a number of beach parks that you can stop at for a rest or to just take in the views! These beach parks have picnic tables too, so it could be a good place to stop to have some of those snacks that you packed along too! Or a water break!
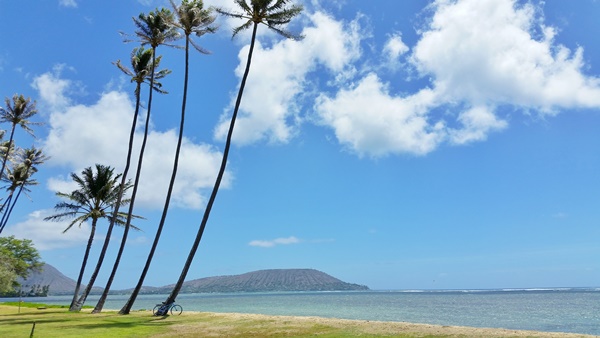
Past the beach parks, there’s a bridge that’s open air. The scenery is nice, but if it’s windy you may feel a bit uneasy.
If a truck drives by at a high speed, it could produce enough gusts to make you a bit wobbly on the bike. This could make it a good idea to walk your bike across the bridge if you feel the wind when you first get on it.

Once you pass this bridge, you’ll soon come across a main intersection at Kalanianaole Highway and Lunalilo Home Road.
This is where the Koko Marina Shopping Center is located, and it makes for a good stop on your way back! Re-energize with a smoothie at Jamba Juice! Or, there might be a Leonard’s food truck with the Hawaii-famous malasada donuts!
So once you’ve gotten to this intersection, you are almost at Hanauma Bay! And also comes the most difficult part of the ride! It’s pretty much all uphill from here!
And you’ll start to see a view of the famous Koko Crater. It’s famous as the Koko Head Hike as a grueling climb up the railway stairs!

In the picture above, see the straight line going up the crater? That’s the hiking trail!
And then you’ll eventually see the Hanauma Bay sign on the right side of the road signifying the entrance to the park. You’ll turn down the road and follow the same path the cars do. (You’ll see a sign that leads to a separate path for pedestrians to take.)
Just past the payment booth for car parking, you’ll see a bike rack to lock up your bike. You can find bicycles, scooters, and motorcycles at this rack.
Bike thieves probably aren’t loitering around Hanauma Bay, but still, it’s good practice when you’re on Oahu to lock your bike up as secure as possible. This can include a U-lock for the front wheel and frame, and a cable lock for the back wheel and frame to attach to the rack.

And then head on down to Hanauma Bay for some snorkeling!

What to wear for Hanauma Bay biking and snorkeling?
To minimize the weight you need to carry in your backpack when cycling, consider biking and snorkeling in the same clothes!
Rashguard shirts like these and quick-dry board shorts like these can be perfect! And the shirts will provide added UV protection from the sun!
You might be cold when you first get out of the water, but give it a few minutes and you’ll likely be fine! By the time you get back to your bike, you’ll be ready to ride! And if you’re still feeling cold, you can always ride with your towel on your back. Your backpack will help to keep it in place.
What to bring to Hanauma Bay?

While not a complete list, here’s a list of some things you may consider bringing along to Hanauma Bay for your DIY bike and snorkel tour on Oahu!
- Snorkeling gear!
- Standard snorkel set like this one
- Or a full-face snorkeling mask like this one
- Beach shoes like these to prevent cuts on coral reef or rocks on the beach, if you won’t be wearing fins
- Backpack with a helmet attachment for an easy way to carry the helmet when you’re off the bike! (Pictured above.)
- Bike light like one of these just in case. Even if you don’t expect to stay out past dusk, things happen! Not only is it illegal to ride at night on Oahu without a bike light, it is far safer so you can be seen!
- Money belt like one of these for easy access to your phone because photo opportunities come often. ? Also makes it easy to go pocket-free to carry cash and credit cards.
- Portable phone charger like one of these so you can keep your phone battery charged after all the GPS usage and photo taking!
- HELMET! Better safe than sorry! Take a look at these types of MIPS helmets. Although there’s debate as to whether MIPS technology actually makes a difference vs a normal helmet, the ideas is to limit the direction your head turns if it hits the ground.
- BIKE LOCK! U-lock to lock the frame and front wheel, cable lock to lock the frame and back wheel to a stationary object.
- WATER! Since Hanauma Bay has some drinking fountains, you might use that as a place to re-fill your water. In this case, you may be fine with not carrying water for the whole day with you in your pack. Although the more water the better, just in case!
- But you may be fine with a regular water bottle or travel-friendly water bottle in your backpack.
- This water bottle is popular in Hawaii because it keeps cold drinks cold.
- You may consider getting a backpack with a spot to put a hydration pack like one of these as a way to carry extra water. Since having a hydration pack makes it easy to drink water, it encourages you to stay well-hydrated.
- SNACKS! Always carry extra snacks! Even if you don’t think you’ll eat them. Having to bike back at the end of the day with no energy… NOT GOOD!
HAPPY HANAUMA BAY BIKING AND SNORKELING!
more things to do on oahu by bike
things to do in oahu | map >> hikes – snorkeling || waikiki – north shore – east oahu
what to wear in hawaii >> what to wear hiking – what to wear snorkeling
There are affiliate links on this page. Among other partners, as an Amazon Associate, I may receive a commission.
🐠 Here are things you must consider packing!
- Swimsuit or swimming shirt aka rash guard
- rash guard: swim set for women and swim shirt for men
- Water shoes
- Waterproof phone case (so you can capture pictures of fishies underwater!)
- cheapo phone case OR waterproof camera
- I also have this "camera" wrist float to attach to my cheapo waterproof phone case so my phone won't sink to the bottom of the ocean in case I somehow let go of it. (Mine does stay afloat - test this for yourself before completely trusting it!)
- Swimming goggles or snorkeling mask set
- Reef-safe(r) sunscreen
- lightweight travel towel:
- walking sandals:
I also don't go snorkeling without a personal swim float buoy. Not only does it help to keep me visible, but it makes for a perfect way to rest out in deeper water! Oh, and it also serves as a dry bag so I can take stuff into the water with me.
Another way I have taken valuables into the water with me is to wear a travel money belt that I don't mind getting wet with salt water (it's not waterproof but I have several so I just use one of them) and then I put things in a ziplock freezer bag, and put that freezer bag in the money belt.
There are also designated waterproof waist pouches that you can store your valuables and take into the water with you.
see more:
- What to wear hiking
- What to wear snorkeling